The Elegant Rider
  • Home
    • What's New
    • Blog
    • Why Simone >
      • Testimonials
      • The Three Tenors - Having Fun with three Andalusian Stallions
  • Lessons
    • Calendar
    • Video Assessment
    • Simone Release
    • Demander Equestrian Release
    • Payment Information
  • Workshops/Clinics
    • Workshops online signup
    • Participant Testimonials
  • Shows
    • Split Pine Ranch 2023 >
      • Split Pine Ride Times / Results
    • Latigo 2023 >
      • Latigo Ride Times / Results
    • Voyager Stables 2023
  • Show management / judge
    • Show Mgr/Secr Testimonials
  • Contact / About
  • Release Forms
    • Proof of Vaccination Form
    • Release Split Pine and Simone
    • Split Pine Release
    • Latigo Waiver LLC
    • Release Latigo and Simone
    • Release Voyager and Simone
    • Voyager Release
    • James Release
    • RMDS Waiver based on USEF
    • USEF Covid Waiver

And then came the Virus

4/12/2020

 
Hello all:

No words of wisdom from me. I think by now we are all tired of hunkering down. Some get to spend extra time with their horses, while others aren't even allowed into the barn.
Hopefully this will pass sooner rather than later and we can get back to riding, shows, clinics and all the fun things we like to do with our horses.
In the meantime - here are my favorite stay fit tips.

For strong abs - the vacuum stomach exercise - start with 5 to 10 seconds rather than the 20 seconds as shown in the video
And my favorite YouTube channel for working out - MadFit
I am linking here to a warm-up video - but check out her channel. I love that there are low impact workout, no equipment workouts and they are reasonable in length. Have fun with it.

The New usdf/usef dressage tests 2019

4/10/2019

 
I recently had the opportunity to attend a “New Test” clinic to learn about the brand new USDF/USEF dressage tests for 2019.
The clinic was organized by the Pikes Peak chapter of the Rocky Mountain Dressage Society. Our instructor extraordinaire was Janet Foy, a FEI 5 * judge. She will judge dressage at the next Olympics. We truly were treated to insights and comments of the highest level.
The riders showed us every test at the level, starting at Training level and ending with Fourth level.
Janet had both great tips for the riders, as well as instructions on what kind of mark certain “sins” would deserve. I therefore will separate each level into ideas for competitors and comments for judges. Some comments apply to all levels, Janet just made them at a certain level.
 
Training level
For the competitor:
Most horses are on the bit at training level however it is not required, acceptance of the bit is enough (but it won’t get you a high score). Your biggest key is accuracy. Make sure you understand the placement of the 20 m circles and how to ride the 3-loop serpentine in Test 3. Be clear about where any of the movements begin and end.
3 - 4 walk steps into the halt on centerline are OK; do not move or wiggle your behind in the halt as it will often unbalance the horse; try to have equal weight on your seat bones into the halt; when you pick up the reins after free walk pick up the inside rein first and think about almost leg yielding towards the outside rein => prevents stiffening
For the judge:
We are looking for steady tempo and correct basics.
If they canter out of the halt it is a “5”.
When judging a stretchy circle think about how high the neck was before they started (i.e. horses with a high-set neck can stretch down a lot less then horses with a low-set neck).
When judging free walk, judge 50% legs 50% top line.


First level
For the competitor:
If you keep a slight shoulder-fore into the halt on centerline you will have better suppleness.
It is important to show a clear down transition from lengthening.
Think about a slight shoulder-in before the half circle 10 meters in Test 1.
On the diagonal the horse’s shoulders should touch the letter that they leave and the one they arrive at.
For the canter depart in Test 2 at the end of the diagonal (movement 15) – do it right at the letter. Don’t go past F and start it on the long side or in the corner. Ride it in the spot where a flying change would be.
On the stretchy circle - the inside rein shows the way down and keeps the bend, the outside rein controls the shoulder.
Get as much done as possible before the new movement starts = prepare, prepare, prepare.
For the judge:
For the change of lead through the trot in Test 3 we want to see 3 to 5 steps with the front legs

 
Second level
For the competitor:
The halt just needs to be settled, but you don’t have to hold it for 3 seconds yet.
In counter canter the hind legs should be on the rail so it's slight renvers feeling.
For the half-turns on the haunches in Test 2 and 3 – center the turns onto the quarter-lines, that gives you plenty of time to set them up and they have a nice balance.
For the judge:
If I am relaxed as I watch them perform then there is enough collection, if the horse is shown above the level of balance then it looks like they are struggling.
In the rein-back count the back steps of the front legs
 
3rd level
For the competitor:
In half-pass it is important to go to the exact letter, you don’t get brownie points for arriving sooner. Start the half-pass with a little shoulder-in.
In your canter extension uphill is more important than power.
How to ride the shoulder-in to renvers (Test 2): From your shoulder-in before E or B increase angle to 4 tracks and then change the bend into the renvers, rather than trying to go directly from shoulder-in into the renvers.
You need to feel your extension in the collection and vice versa.
For the judge:
If a hindleg is resting in the halt, it can't be more than a “6”.
Extended walk must have contact and needs to show overstep.
When we add length (extended vs medium vs collected) we take away height.
When trying to decide between a “7” and an “8” in gaits, if the horse shows more freedom in extensions use this to go up.  
Turn on the haunches: if against the outside leg and thinking backwards it is a “4”.
 
4th level
For the competitor:
For your canter entry use a little shoulder-fore to stay supple, then use your very collected canter before X and into the halt; the halt should feel like snow floating to the ground.
For an expressive depart practice going to medium trot from the halt.
Half-pass has the most bend, shoulder-in has medium bend, voltes have the least bend in body when you compare those three.
A counter change of hand means two half-passes in a different direction, a zigzag is considered three half passes or more in different directions (important when designing a freestyle).
If you are showing walk on the straight line that judges see from the front keep the pole high.
In the half-pirouette think about the strides like pieces of a pie and make them the same size.
When doing the three flying changes in Test 1 put the middle change right over X.
When thinking about creating a freestyle: Lengthenings and extensions always look better towards the judge.
For the judge:
What to do if the rider has forgotten a movement and already left the arena?
The movement needs to be judged with an average score.
What to do if the rider has forgotten a movement, done the final salute and the judge realizes that the movement is missing?
Have the rider execute the missing movement, score it and in addition give an error for that movement.
 

The importance of saddle fit

1/17/2019

 
I recently came across this video that gives some excellent information about saddle fit and the elements that need to be considered.
Please note that I do not endorse any particular saddle or saddle fitter with this blog - but I do want to raise awareness.
Also - Jochen mentions that the gullet needs be wide enough for the horse, which is completely true. However be careful of gullets that are too wide as they can be destabilizing.
Saddle fit is both art and science and my best advice is to spend time with a dedicated and well trained saddle fitter.
Here are some excellent supporting articles.
​
How to fit more than one horse with the same saddle
File Size: 501 kb
File Type: pdf
Download File

Saddle fit and girth choices
File Size: 6915 kb
File Type: pdf
Download File

Saddle fit and saddle trees
File Size: 7566 kb
File Type: pdf
Download File

Saddlefit English vs Western
File Size: 1494 kb
File Type: pdf
Download File

How to hold your very own RMDS recognized dressage show

5/3/2018

 
When it comes to holding a show, you have three fundamental options:
1. A completely unrecognized show = schooling show.
2. A RMDS recognized show = run under USEF Level 1 competition rules.
3. A fully recognized show = run under USEF Level 1 competition rules or higher.

A list of specific requirements for the different levels can be found in the USEF rulebook in the Dressage division. A chart for levels 1-5 can be found on pages 541-544, DR126. https://www.usef.org/forms-pubs/F3p8pgrWgAo/dr-dressage-division

Lately several people have asked how to hold a RMDS show

RMDS has listed the requirements right here - http://rmds.org/uploads/Organization/StandingRules.pdf

A quick summary:
  • Pay recognition fee (go to the Forms page http://rmds.org/Publications/Home  $50).
  • 50-mile rule.
  • You need an RMDS or USEF approved judge (L Grad or higher).
  • You need an RMDS approved TD and an EMT on the grounds.
  • Show needs to be advertised with RMDS and have an accessible prize list.
  • Secretary/manager must be an RMDS members
  • Proof of insurance is required – contact your insurance company for this, you need a Certificate of Liability Insurance from them that lists RMDS
  • Participants do not need to be RMDS members (scores for year-end and championship qualification only count if they are members).
  • Scores need to be reported to RMDS within 14 days.
  • Western Dressage classes allowed (hard hat required though).
Check out all the details in the standing rules.
When in doubt or not stated in the RMDS rules, RMDS will default to USEF rules. Therefore it is a good idea to familiarize yourself with the Dressage rulebook and also the General rulebook. They are available on the USEF website at www.USEF.org.

Facility needs
A facility that has a dressage arena and a warm-up arena. You can hold your show either in an indoor or outdoor. Your arena should either fit a dressage ring or measure 20 x 60 meters. If you are close to the correct size, you can ask for an exception. You also need to have a dedicated lunging area.
A judge’s stand (which in a pinch could be a pickup truck or the back of a horse trailer) ideally is placed back 5 meters from the arena. Your stand cannot be inside the arena if that will make it too short. Letter should be placed 0.5 meters back from the arena or on the kickboards or wall of an indoor arena if the arena width is 20 meters.
Parking for horse trailers, spectators and helpers. You also need a restroom. If your bathroom in the barn can’t handle the crowd then rent portable restrooms.

Personnel needs
You need a manager and secretary. They can be the same person if very experienced, though I highly recommend you have two people for this. If you have never been a show manager or show secretary before then you should hire those. This is in addition to the judge, TD and EMT that you must hire for your show.
Another prerequisite for your show: a few good volunteers. A scribe for the judge, a runner that will bring tests to the show office to be scored, a warm-up steward to help riders get to the arena in a timely manner and a bit and equipment checker to check the riders and horses once they have completed their test. It is also quite helpful to have office help that can double check the scoring and help with checking in riders, posting scores, etc.

Equipment and materials needed
Arenas should be freshly groomed at the start of the day and then dragged again during the lunch break. If you anticipate a dry day you should also have an option to water the arenas during lunch.
2-way radios for all show personnel are great. It is the fastest and easiest way to communicate (cell phones sometimes don’t work well in remote areas); they are not required.
Office equipment – computer, software (highly recommended), printer, tests (need to be labeled or hand written with horse/rider information), pens, lots of clipboards (legal size clipboard recommended for the tests), a place to post day-sheet (order of go) and scores. 
Pillows and possibly blankets for judge and scribe, cooler for judge’s box (with some water and snacks), paperweights, Kleenex, bug spray, sunscreen for judge and scribe. Have extra for your runners, warm-up stewards and bit checkers. 
Ribbons – you can order them online from Hodges Badges or other suppliers.  You can also order bridle tags from Hodges. Decide how far you wish to place your classes (e.g. ribbons to 4th place, 5th place, 6th place). You can also offer first place prizes and high-point awards. Competitors appreciate getting prizes in addition to their ribbons. 

Timelines, advertising and other considerations
It is best to plan for a show at least 6 months to a year out. If you know that your facility can fulfill all requirements, then check the show schedule on the RMDS website and see where your show might fit best. Also consider weather if you are planning an early or late show in the season. 
For a RMDS show it is your choice if you wish to offer food on the premises. You need to have food for your officials and volunteers if you run for a full day. Providing coffee and donuts or some free snacks makes for a nicer environment and your competitors are more likely to attend one of your future shows. If you are planning on selling your own food, make sure you are not in violation of any food safety laws. 
Contract judges, TDs, EMTs early, some of them book a year out. Hire a manager/secretary if you cannot run the show yourself – again, they tend to book early.
Order your ribbons early (they charge rush fees if you get close to a show date). A full day will be about 40 rides, a very full day will be around 60 rides. When you offer different divisions (Junior/YR, Adult Amateur, Open) you need a lot more 1st and 2nd place ribbons than you need 3rd and below. Contact me if you are unsure on how many ribbons you should order.
Create a prize list and consider advertising in the RMDS omnibus.  Check out prize lists from other RMDS shows as samples. Your prize list needs to be accessible (e.g. on your website). 
Get your show on the RMDS calendar and start getting the word out on Facebook, Twitter, your website and all other online places that allow you to promote your show. It also helps to do a direct email – either via your personal list or to the RMDS membership via an email blast. 
When you create your day-sheets make sure you have breaks in the schedule.  There are USEF rules that pertain to scheduling. You can find them in rulebook at www.USEF.org. 
Here are some tips on how I schedule: I normally put the first 10 to 15-minute break after about 90 minutes from the start time, then 45 to 60 minutes for lunch and another 10 to 15-minute break in the afternoon if the show runs for a full day. It is also a good idea to “pad” your schedule, that means I will start the next class 1 to 2 minutes later after every 6 to 8 rides. In other words, if by your calculations the class should start at 11:05 am, I might start it at 11:07 am. That gives a little extra time for incidents like off course riders, or the judge needing more time for comments. Overall it will keep you on schedule and make your riders happy.

Why to hold a RMDS show
Holding a show at your barn might be a great benefit for your boarders as they don’t have to travel to a show. It also can give your barn community a boost with everyone getting involved. Shows can be a great marketing and promotion tool for your barn and resident trainers. And finally: a well-run and well attended show will make you money. So, go ahead, be brave and hold your very own RMDS show.


A short one today about Piaffe

3/26/2017


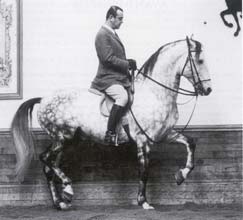
Piaffe and why one cannot use a whip to create it
​

Picture
The famous Nuno Oliveira in piaffe
Piaffe gets created by increasing the deceleration phase. In the breaking or deceleration phase the horse stores energy – the more I have of that the more I can release.
Normal breaking happens during 45% of stride, whereas in Piaffe it is up to 80% of the stride. The smaller the forward push of the hind legs, the better piaffe because the upward push comes from front legs.

If the best piaffe comes from letting the hind feet stay on the ground longer it becomes very clear that a stimulation with the whip will create the opposite. It will stimulate the leg to leave sooner rather than stay longer.

You cannot touch the front legs either – elevation of the front leg is an elastic recall that creates the lift. Touching them with the whip will disturb that elastic recall. If you touch the front legs the horse will often bring the front legs back too far (goat on the mountain top) and again no elastic recall. Also - if there is too much weight on front legs then you can’t get elastic recall. Touching the hind legs with a whip will create a lift in the croup which in turn will overload the front legs. Many horses respond then by bringing the front legs too far back.

In the piaffe the legs need to be perfectly straight under the body – if you bring the hindlegs more under then the horse cannot use its legs like a spring. The push up from the hind leg happens when the hind leg is just a bit behind. If you make the horse piaffe with the hind leg too far under you create a functional sickle hock. As a matter of fact the hind legs in the piaffe are less under the body than they are for collected trot.
​
Ultimately dressage is about education not to teach a trick. Using whips to teach piaffe creates a trick which then often cannot be recreated in the competition arena.
​

How do you create Piaffe then?


You teach more lift by more straightness – once the horse figures out how to use the back and they stay in deceleration 80% on hind leg – when they push forward they do minimally so – then the forelegs can propel with 81% upward.

Piaffe is the ultimate orchestration of the entire body.

If you teach a young horse the pinot jog – they learn how to propel the front legs upward – this takes up to 5 years and then you refine it until you reach Piaffe.
Some horses offer passage first and then develop piaffe from it, some horses are not comfortable to handle the forward movement with the balance control so they do piaffe first. If they learn passage first often the piaffe is more elastic.
​

​What is the Pinot trot?


​Jean Luc has shown us Pinot trot (which he named after the guy that showed it to him first) during some of his lessons.

Pinot trot is rising trot where the rider stays very close to saddle, hands rest on neck, a slow cadence set with the body, think about keeping knees down. During that slow trot, the rider keeps pushing the horse forward, doesn't let him lean on the hand and maintains cadence until the horse starts lifting the back. This jog is also a good way to get the horse to let go of an isometric hold in the back.

To create maximum output for minimum effort: the horse needs to use its back.

The rider puts the horse at its natural cadence. The he/she filters the energy and nuances with his/her body rather than using the hands. As the rider continues to push the horse forward he keeps the small steady posting in his body. Once the horse offers longer steps it does so by lifting the back. More lift can come from a better dorsal-ventral movement of the pelvis. Both the Pinot jog and the canter encourage that pelvis movement.
​
My own epiphany: Many movements / exercises in today's training have a kernel of truth but the true reason and background have either been lost or are just not understood biomechanically => exercises are executed mindlessly and therefore do more harm than good. Therefore it is necessary to constantly observe and evaluate if the movement creates the desired effect in the horse's body.

Recommended Reading

3/12/2017

 
​No, I am not done with my notes from the Science of Motion symposium yet, however one of my blog readers has asked me which books I would recommend. Let me first state that books are a great resource but also likely to be outdated if they contain studies or newer information on biomechanics. That means if you are interested in new information you are better off to find a good website that regularly updates.
If you like Science of Motion, then you have found the website of course – www.scienceofmotion.com. There are several tabs that have quite current findings and studies as compiled by Jean Luc Cornille.


When it comes to books I like to separate them into two big groups:
  1. Tips and ideas that make you a better rider
  2. Tips and ideas that help you understand the body of the horse and specific exercises that can help you train your horse
 
So first my favorite for the Rider books:
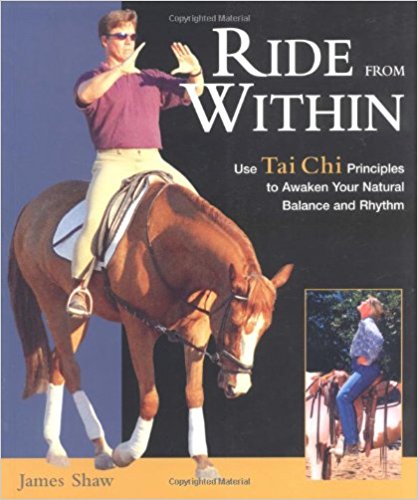
  • Ride from Within – James Shaw
    • Here is a book that teaches you how to control your body better by applying Tai Chi and Chi Gong methods. The basis of everything is a very effective breathing method and James shows many exercises that can be done on the ground and in the saddle. I found them to be extremely effective. If you are a visual person, he has two DVD’s that accompany his book that I recommend. James has further developed his method, if you get a chance to experience him in person, please do. I have written about some of his ideas in earlier blogs – check the July 2015 one. James has a website - http://www.ridefromwithin.com/
Picture
​
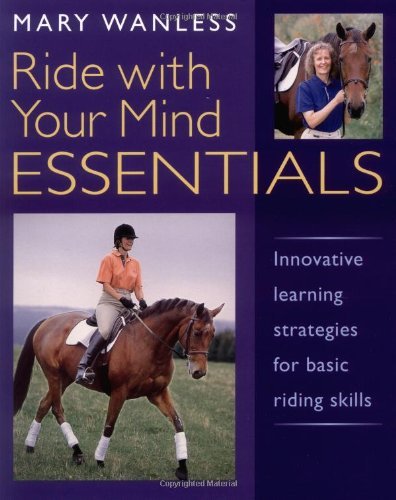
  • Ride with your Mind Essentials – Mary Wanless
    • If you learn by picturing certain movements and positions this is a great book. Mary has quite a few books out, this is my personal favorite and the one I go back to when I need to refresh my ideas on teaching. Mary does hold a few clinics in the US, check out her website for more details - http://www.mary-wanless.com/
Picture
​
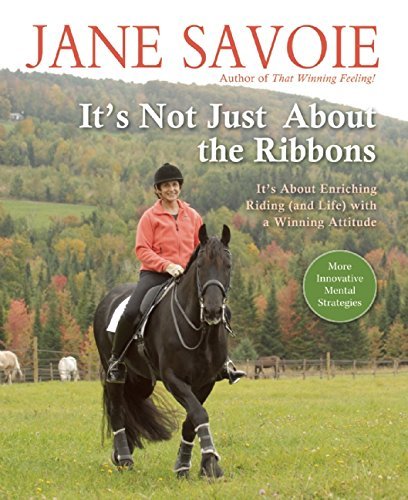
  • It’s not just about the Ribbons – Jane Savoie
    • A wonderful book to help you with the mental side of riding. As physical as riding is, your mind plays a huge role in being successful and confident on a horse. Jane points out some great strategies to achieve that. Her website is - http://www.janesavoie.com/
Picture
​And now the about the Horse books:
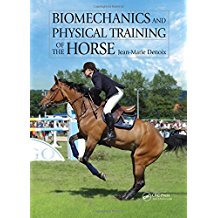
  • Biomechanics and Physical Training of the Horse – Jean-Marie Denoix
    • Mr. Denoix holds a PhD in veterinary medicine and is a specialist in equine locomotion. If you want some very current information on how horses move, what happens in their body when their hooves impact the ground, then you will find this book quite enlightening. There are many illustrations that help you understand the matter. With your updated knowledge, you will also find why it is best to avoid some exercises and which ones the horse can benefit most from. It certainly can help improve your training. Here is his website - http://www.iamanequineveterinarian.com/dr-jean-marie-denoix/
Picture
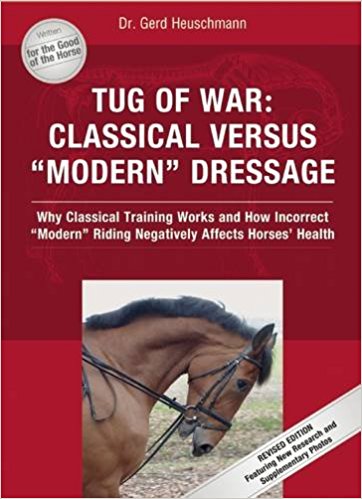
  • Tug of War: Classical versus “Modern” Dressage – Dr. Gerd Heuschmann
    • One of the earlier books that questions current training methods and gives great biomechanical insights into the movement of the horse. Especially the information on the back, where to position the neck, how the reins and bit can have an unintended effect is important and well presented. Dr. Heuschmann since has published a second book “Balancing Act”. Another good book. If you only want to buy one, get “Tug of War”. Dr. Heuschmann’s website is - http://www.gerdheuschmann.com/. Currently it seems to be only in German. I know he did have an English version.
Picture
​
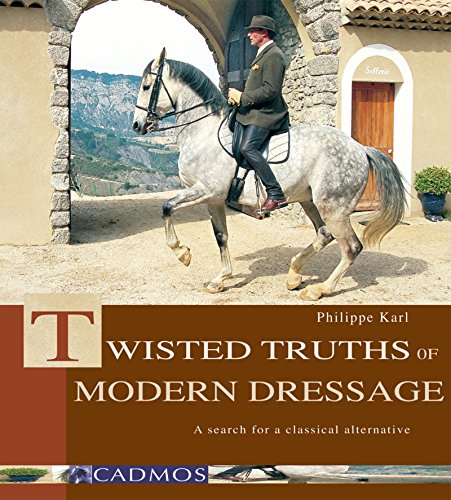
  • Twisted Truths of Modern Dressage – Philippe Karl
    • Philippe Karl studied at the Cadre Noir (incidentally so did Jean Luc Cornille) and this book questions many “tried and true” training methods. He does make it very clear why he does not like some methods, how they can be detrimental to the horse and how our understanding of dressage has changed in the last 50 or so years. An interesting read, certainly eye opening - http://www.philippe-karl.com/
Picture
​
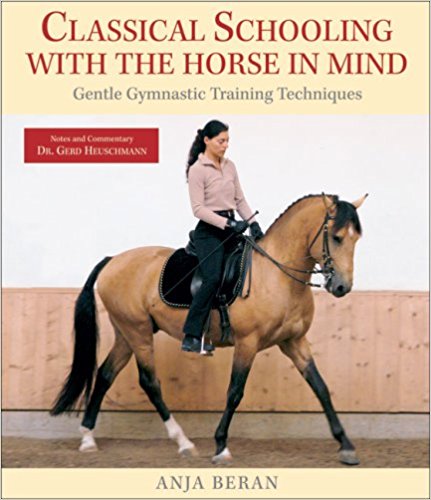
  • Classical Schooling with the Horse in Mind – Anja Beran
    • I had the great pleasure to meet Anja at one of her annual performances at Circus Krone in Munich. She certainly embodies the idea of lightness and correct riding with the horse in mind. This book takes you in logical progression from selecting a horse, through all training stages to Grand Prix movements. Well written and with many useful illustrations. Anja mostly trains out of her facility in Germany (good excuse for a trip) - http://www.anja-beran.com/
Picture
​
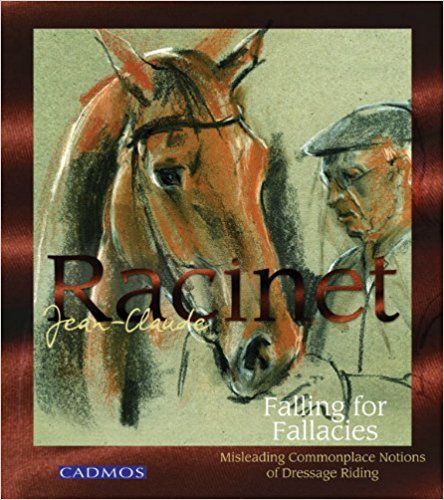
  • Falling for Fallacies – Jean-Claude Racinet
    • A very interesting book that questions many statements that are made day in and out by riding instructors across the globe. Mr. Racinet starts with the statement and then shows you why the reality might be quite different from common beliefs. Mr. Racinet passed away in 2009.
Picture
​
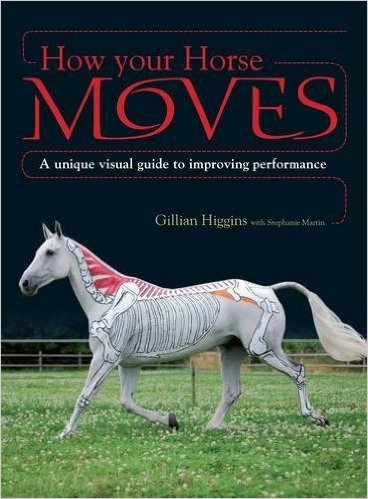
  • How your horse moves – Gillian Higgins
    • Gillian paints horses – specifically she paints muscles and bones onto the horse and then shows you how everything moves. A wonderful book to get a better idea of the placement of bones and muscles. If you wish to see it in motion – she has a great DVD as well - http://www.horsesinsideout.com
Picture

More from the science of motion symposium

2/28/2017

 
​Today I want to continue with more information from the symposium. Jean Luc wanted to clearly show us the incredible complexity of the horse’s body and allow us to think beyond the outside of the horse.
Again, all images in this blog were found on Google Images.
 
What is a functional straight hock?
With a functional straight hock the horse impacts too early on hind leg. This results in the lower part of the leg not moving in conjunction with the upper joints.
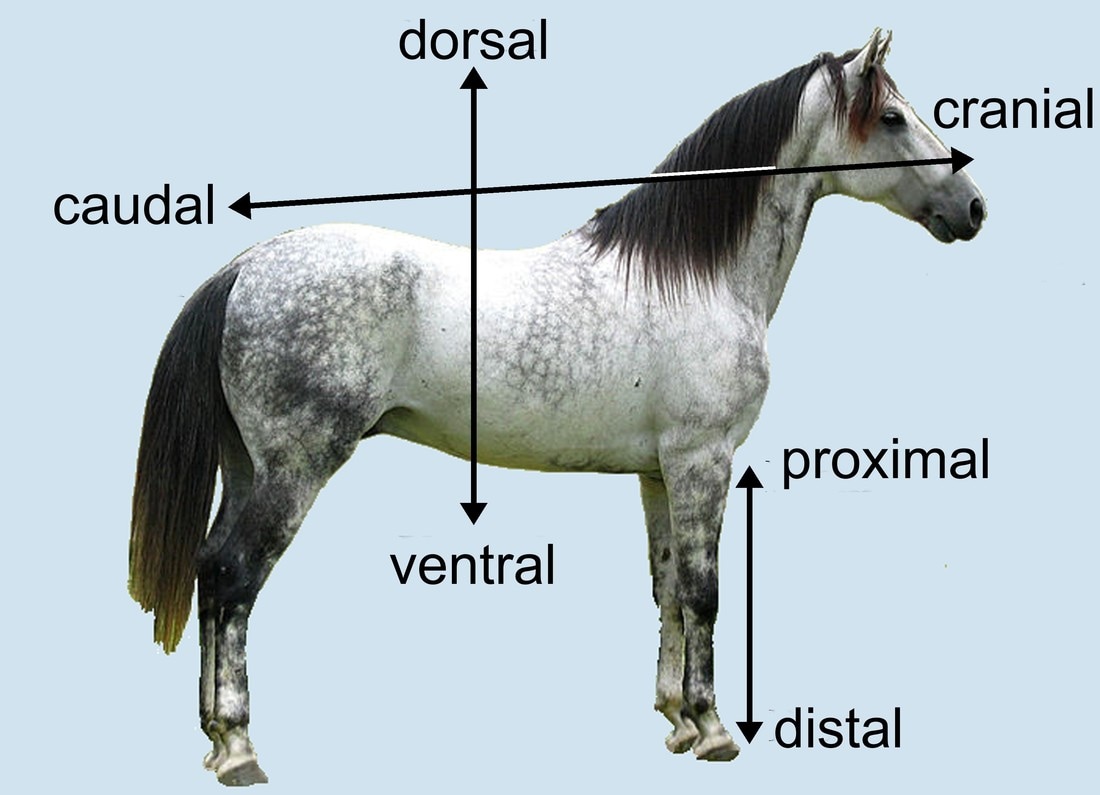
If a horse goes faster than its personal tempo (i.e. ridden too much forward) – then the speed causes them to stiffen their back which decreases movement in the lumbar / pelvis area and impedes the dorsal ventral movement – see picture below. A stiff back does not allow the pelvis to move the way it should and thus the hind leg impacts too soon. Therefore, riding too forward can do much more damage than good.

Picture
​Why, do you ask, do they often look better then at a higher speed?
The stiffer back causes the limbs to move with more extravagance which can appear flashier. But as you are finding out at potentially great cost.
Often the early impact of hind leg is caused by front legs being overloaded. If the front legs are overloaded (e.g. by riding the neck too low) then they cannot leave soon enough and effectively are in the way of the hind leg.
Hyaluronic Acid
Once damage has been done in joints they often get injected with hyaluronic acid. Hyaluronic acid has shown some excellent results. However, if used as “maintenance” and repeatedly it has shown to encourage the development of fibers inside the synovial fluid which makes it less effective. The best answer is to correct the movement of the joint to avoid further damage.
Picture
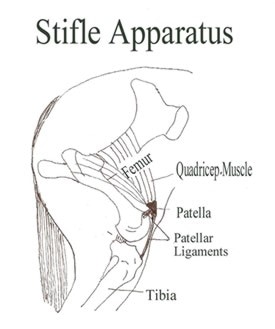
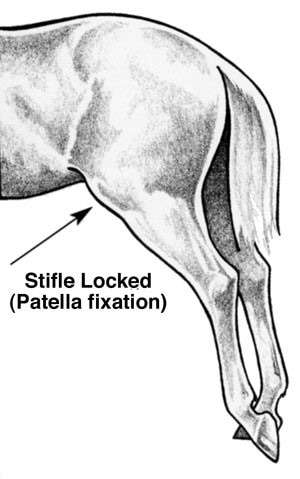
The horse can lock its patella for resting. Deliberate locking of the patella locks all the joints below it.
If the stifle extends too far then the patella will lock by accident. A horse can ​avoid the accidental lock.  
Picture
​Better movement in horse comes from better movement in the pelvis.
The dangers of asking for more “step-under”
If I ask for more engagement of the hind leg and ask for it via spur, whip, or my leg then I can create an abnormal movement. For example, if the horse steps more under without matching movement in the pelvis then an over rotation in the hip occurs, which in turn rotates the femur wrong. The following extension of the leg behind the horse is often beyond 145 degrees and causes the patella to lock. The horse will respond quickly and avoid the accidental lock however damage to the stifle will occur. In addition, artificially created “engagement” of the hind legs without the proper movement in the pelvis causes stress on the SI joint.
 
Canter can help
The best gait to create move movement in the lumbar/pelvis area is the canter as it creates the dorsal-ventral flexion by itself. This would explain why many horses feel more “springy” at the trot after they have cantered.

Picture
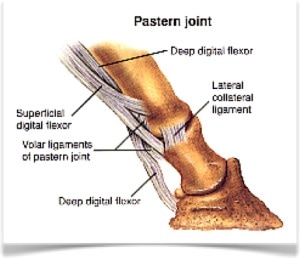
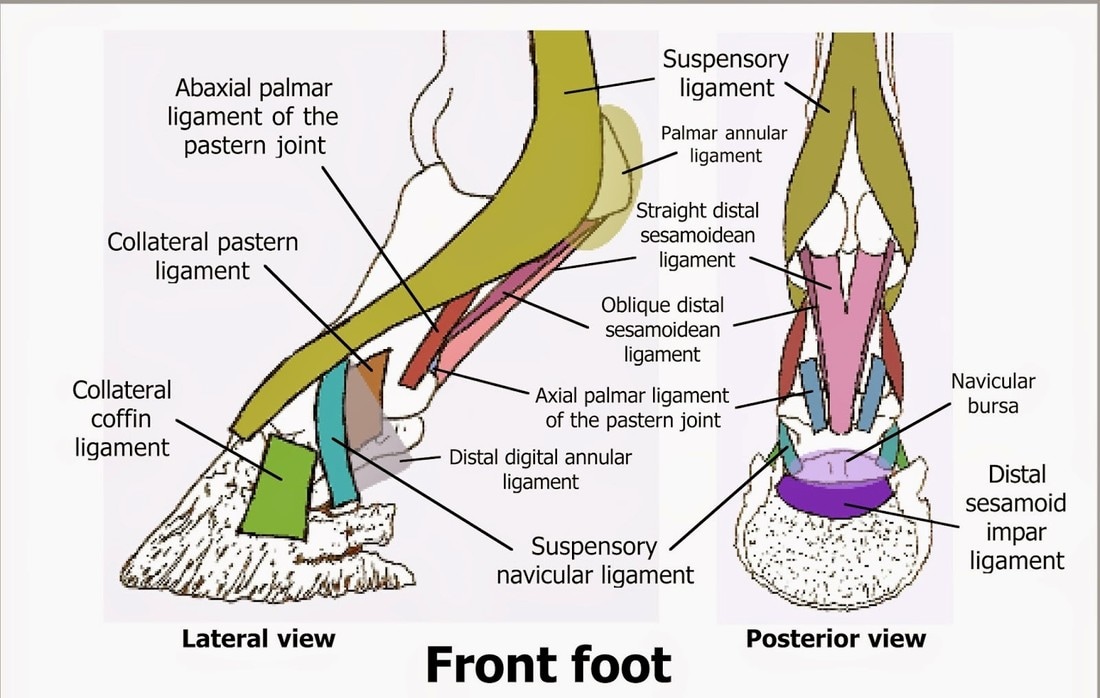
​The ligaments around the joints are designed to absorb the impact and they are attached in different ways to allow for force from different directions.
 
Looking at the front foot you can see a great number of various ligaments.
Picture
​The bone structure also plays a role.
 
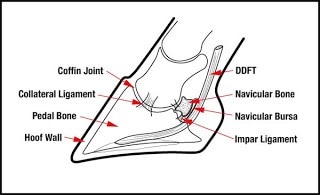
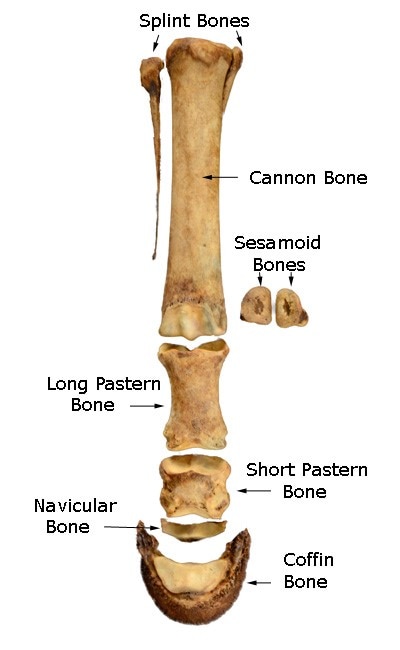
The Navicular Bone
The navicular bone is there to make sure that coffin bone is always at the same angle. The wrong angle will cause damage.
When you have a navicular problem you might have two issues:
  1. How is the hoof shaped –  your farrier can help
  2. Too much weight coming on forehand
 
Picture
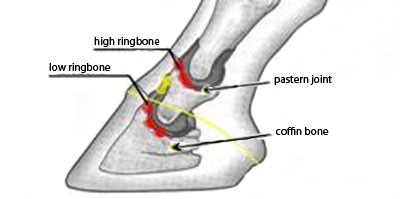
​Ring Bone
 
Another problem caused by constant over loading of the front legs is ring bone. 
Picture
​Ring bone is basically arthritis in the pastern joint or coffin joint. The arthritis has caused a bony structure in the joint and is quite painful for the horse.
 
What causes joint damage?
The cause of any joint damage is usually abnormal kinematics. Abnormal kinematics can happen through overloading, stimulation of the limb (e.g. via whip), stiff back, wrong movement of the back or poorly designed exercises that cause wrong movement in the horse.
As mentioned before over loading the front legs can happen in various ways:
  1. Bringing the neck too low
  2. Horse pushing / leaning on the bit
  3. Horse travelling with a stiff back
 
With your new-found knowledge, you can now make some adjustments in your riding and training. Next time you are thinking about simply riding more forward to fix an issue, take a moment to think what might cause it and find a better solution.
In my next blog, we will look at specific movements and typical problems and how to fix them.

Science of Motion Colorado Symposium 2017

2/22/2017

 
​On February 18 and 19, 2017 Jean Luc Cornille of Science of Motion held his second annual symposium in Colorado.
I will share some of my notes and thoughts from the symposium in a series of blogs.
Jean Luc Cornille has developed Science of Motion over the course of well over 30 years. Trained by the Cadre Noir and showing internationally in three day eventing, he soon realized that many ideas that we held to be true have been proven false by modern science.
I met Jean Luc a few years ago, and it has been an eye-opening journey. Many theories that I had learned over the years on biomechanics of the horse and on how to train and ride have been overturned by this new knowledge.
While Jean Luc is the first guy to tell you to respect tradition, we also need to face new facts and studies. The development of new technology, slow motion video, ultra sound, bone scans, motion studies have shown us, that many theories are obsolete and we need to update our training accordingly.
Often things will look a certain way on the outside and move or work completely different on the inside.
Jean Luc’s goal is to educate and show us a better way of riding.
I have learned that many injuries in horses are repetitive motion injuries. If a horse moves in wrong alignment, in the wrong balance, with tight muscles then an injury cannot be avoided in the long run. While it is important to use all means necessary to treat the injury, ultimately only correct movement can facilitate healing and prevent re-injury.
Therefore, I had to let go of many training theories and exercises as the scientific evidence clearly shows that they are likely to cause injury. I must apologize to all the horses I have ridden and trained without this advanced knowledge.
Jean Luc’s goal this year was to show us first the incredible complexity of the hind leg of the horse. He had a wonderful video of the skeleton of a hind leg. All the joints have been fitted with magnets so Jean Luc can move them in any direction and show us which movements are possible and which ones will cause damage.
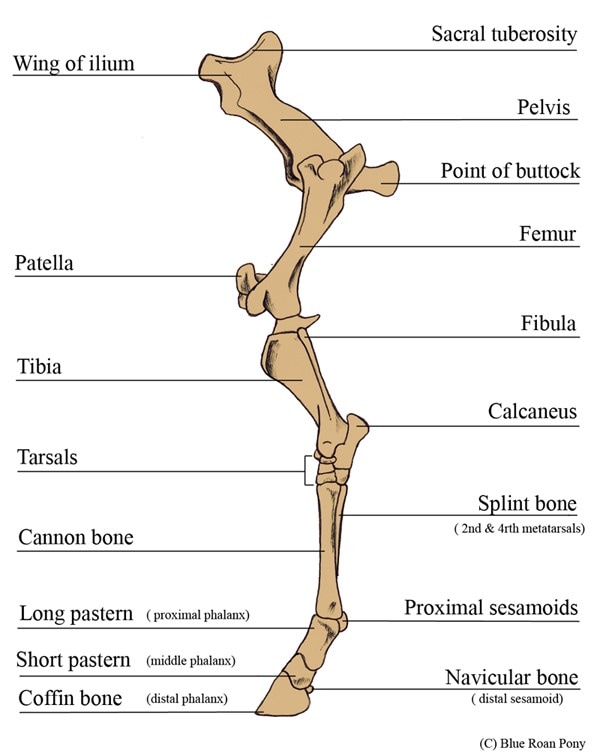
Let’s start with an overview of the hind leg.
All images in this blog were found on Google Images.
Picture
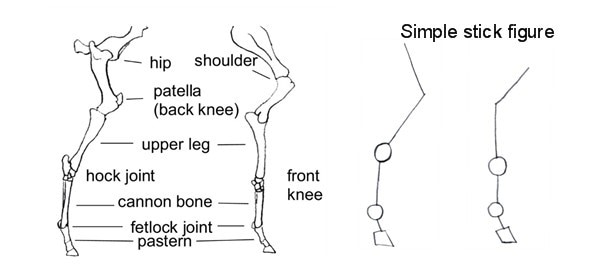
​And here are the major joints – this drawing compares the front and the hind leg.
Picture
​Typically, in the hock you have extension and contraction but also rotation. Everything must work in perfect synchronization to avoid doing damage.
The hock has 4 joints – if there is abnormal movement it will rotate the splint bone, which can cause suspensory problems.
A hind leg suspensory problem is a kinematic abnormality – which means the hind leg moves incorrectly. In contrast, suspensory problems in the fore legs are normally caused by overloading them.
In the hind leg, we basically have an unnatural movement of the bone which in turn causes these problems.
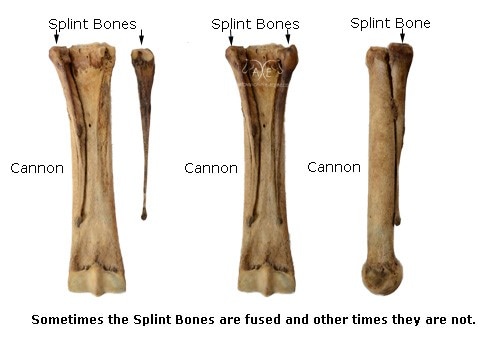
Picture
​The splint bones are big to stabilize the fetlock and handle stress. Why is the fetlock relatively small? To allow for speed.
The horse has been designed to minimize weight in legs to increase speed. The splint bone is basically a secondary system to support the fetlock.
Picture
​The sesamoid bone keeps the tendon at a small distance from the bone which allows for more movement.
When foot hits the ground the energy does not go all into the ground. Within stride the following happens:
  • For the first 0% -20% of the stride energy goes down
  • For the next 20% - 45% the energy goes up
  • For the next 45% - 60% of the stride it is a mix of downward and upward force
  • For the next 60% - 90% there is upward force
  • And finally, on 90% - 100% we have the break-over
 
During the movement, the hock will rotate by a certain amount and that in turn also rotates the fetlock. If the rotation does not happen correctly it will create a shearing force within the hock, specifically between MT3 and T3.
When the hind legs impact the two upper joints in the leg move together and the two lower joints also move together.

The advantages of riding with a looser leg

1/29/2016

 
For the last few months I have been riding a very sweet young Andalusian mare. One of the things she has taught me is to ride with a much looser leg.

Why would you want to do that and won’t it create less balance you are asking?
​

I am not talking about keeping my leg completely off, but rather keeping the whole leg soft and draped along the horse. The advantage is that I can feel her much better. I can feel if she gets tight on her sides, if she hollows under my inside leg in the turn, how her body moves. She in turn moves much more freely and relaxed, the softer I can keep my legs.  It allows me to keep them more quiet as well. The more tension there is, the more my lower leg will bounce around.
​
What about balance?
Actually I think it creates better balance in your seat since your body weight works much more efficiently that way. Every time you grip anywhere with your leg – be it your upper thigh, your knee or your calf – you literally push yourself out of the saddle and away from your horse. Keeping deeper in the saddle also gives you much better feedback if you start to lean a little to the left or right and you will be able to correct it quickly and with minor effort.

No, it is not easy and if you own a big moving horse you might find it very difficult, especially in the trot.  By the way I do this in the sitting trot, I think in posting trot some more contact with the leg will be hard to avoid. Try it in the walk and if you feel safe in the canter.  If you have not read my blog about breathing – do so, you will find it essential to allow for those looser legs. Then start enjoying a more relaxed horse and a more relaxed you.
​
Let me know how it goes J

More insights on bending – Or how to turn effortlessly

11/5/2015

 
If you have read my last blog you should have a better idea on transversal rotation of your horse’s spine.
Look again at Mr. Denoix's picture in the last blog.

What if there was an easy way to ensure correct rotation and bending?
What if you did not need to use an outside rein or outside leg to “fix” falling out of the circle ever again?


Let me show you
First of all you need to become aware of your seat bones. To do this start with
  1. Breathe in – breathe out (see my earlier blog). If your body is  not relaxed those seat bones are hard to find
  2. Imagine your seat bones as two pieces of fruit. That sounds silly but it does engage your right brain and voila – you found them.
  3. Let’s say you ride around on two very pretty peaches. Focus on your inside peach only. As your horse pushes off with his/her inside hind leg you should feel your inside peach getting lifted. Take your time to feel this.
  4. Following the lift of your inside peach, you will next feel a drop. That is the moment your horse’s inside hind leg is in the air and reaching forward under his/her body. Again take your time to feel this. You might need to engage a friend’s help from the ground to make sure you feel it correctly.
  5. Once you can feel the drop consistently – tell yourself the word “drop”, “drop”, “drop”.
  6. Now let’s try to ride a left 10 meter circle – simply turn your sternum to the left, to the inside of your circle in rhythm with the “drop”, “drop”, “drop”
  7. Enjoy a perfectly ridden circle – with no drifting, no need for rein aids, outside leg aids etc.
 
Did it work? Great.

​Try again. You should be able to turn from a straight line onto a circle simply by rotating your upper body and perfect timing on your dropping seat bone.
 
It did not work? Ok – trouble shoot
  1. Are you certain you have the timing right and your seat bone is dropping – again ask a friend to watch your horse and tell you when the inside hind leg leaves the ground. When the inside hind leg is in the air – that is the moment you should feel the drop
  2. Are you rotating your upper body and pointing your sternum to the inside of the circle without leaning? Your spine should stay perpendicular to the ground
  3. Does your body rotate one way but not so much the other? (just like your horse – hmmmm)
  4. Are you blocked somewhere in your body – are you still following the breathing pattern with breathing out the extra step?
  5. Is your horse falling in? Try to not let your inside seat bone drop quite as much and check your rotation in your upper body.
Does this work at all gaits? Of course
  • It is easiest to discover it in the walk.
  • In the trot – if you sit the trot you once again should be able to feel your seat bones and the drop.
  • If you post the trot – rotate your body into the circle the moment you sit in the saddle.
  • In the canter – your seat bone drops when both hind legs come under the horse.
 
Now go out there and ride your horse. Let me know how you like your circles.
 

<<Previous

    Simone

    Finding new and better ways to ride and teach.
    Always a student.

    Archives

    April 2020
    April 2019
    January 2019
    May 2018
    March 2017
    February 2017
    January 2016
    November 2015
    August 2015
    July 2015

    Categories

    All

    RSS Feed

Proudly powered by Weebly
  • Home
    • What's New
    • Blog
    • Why Simone >
      • Testimonials
      • The Three Tenors - Having Fun with three Andalusian Stallions
  • Lessons
    • Calendar
    • Video Assessment
    • Simone Release
    • Demander Equestrian Release
    • Payment Information
  • Workshops/Clinics
    • Workshops online signup
    • Participant Testimonials
  • Shows
    • Split Pine Ranch 2023 >
      • Split Pine Ride Times / Results
    • Latigo 2023 >
      • Latigo Ride Times / Results
    • Voyager Stables 2023
  • Show management / judge
    • Show Mgr/Secr Testimonials
  • Contact / About
  • Release Forms
    • Proof of Vaccination Form
    • Release Split Pine and Simone
    • Split Pine Release
    • Latigo Waiver LLC
    • Release Latigo and Simone
    • Release Voyager and Simone
    • Voyager Release
    • James Release
    • RMDS Waiver based on USEF
    • USEF Covid Waiver